Today I will explain how you can fix the iTunes error 9006. You might have this issue when you are trying to download, restore, or update iTunes on your iPhone or iPad. The error message says: “There was a problem downloading software for the [Phone/iPad] or “An unknown error occurred (9006). Make sure your networks settings are correct and your network connection is active, or try again.”
In some cases, this message may pop up to show that the update, download, or restoration of iTunes has failed. This will typically be triggered because there was a connection issue between iTunes and the Apple store and servers.
I’ll list a few ways that you can fix this error, so you can clear the issue up in no time.
To Check First
Before even looking at the different fixes that are available, here are the following items that you need to check out the following:
- Check the iTunes version; if it is not the latest version, have it updated
- MacOS – launch iTunes and select iTunes, then click Check for Updates
- PC/Windows – launch iTunes and select Help, then click Check for Updates
- Make sure that you can log on as an administrator
- The date and time must be correctly set on your device
Additional Methods to Try
What I list below will be the easiest things for you to try in order to fix your Ios problem. They are fairly simple and require little time to check them out. Here are things you should try:
- Unplug additional cables from your computer, like headphones; only keep your iOS device, your keyboard, and your mouse connected
- Try using a different USB port or cable; sometimes a port or cord has died and needs to be replaced or fixed so this allows you to see if this is truly the issue
- Use a different computer and see if that works; it is possible your ios device or your computer is not compatible with iTunes
- Try a different Wi-Fi connection, as it could be your network blocking your connection
- Make sure that you have access to ports 80 and 443 while on your network
- Restart your computer
- Restart your iOS device
- Restart your router
- Your router could block iTunes; try connecting your computer directly to the modem with an ethernet cable
- Contact your internet provider if you do find that there is an issue with your internet connection
If none of this has worked, continue reading to get some more tips on how to fix the issue.
Third-Party Software
In some cases, there can be a problem with iTunes used in conjunction with third-party software; in particular, with your security software. Some security software can cause connection issues by interrupting communication between iTunes and Apple’s servers.
To see if this is the case, try disabling or uninstalling your security software. The best way to check is to:
- Exit the iTunes application entirely
- Disable/uninstall the software from your device
- Restart your computer
- Try opening and using iTunes again
If iTunes works with it disabled, search for a new software that is compatible with the program. If this tip did not help, try using the next method.
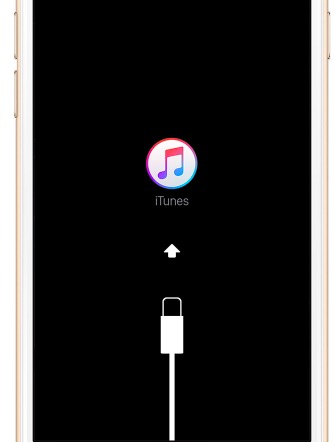
Recovery Mode
Recovery mode is one method which can help your iTunes to begin functioning again. To enter recovery mode, do the following:
- Exit the iTunes application entirely
- Connect your iOS device to the computer
- Launch iTunes again
- Force restart your iOS device by pressing and holding the home and sleep/wake buttons at the same time until the recovery mode screen appears
- For iPhone 7 or iPhone 7 Plus users, press and hold the sleep/wake and volume buttons down at the same time to make the recovery mode screen appear
- The options to Restore or Update will appear; select the Update option

Conclusion
For this particular error, these are the only real fixes to the problem that you can take on your own. If none of these have worked for you, contact Apple support. Explain what you have already tried and what the error is.
But hopefully, something listed within this article managed to work for you. Enjoy using your iTunes application once again!